How to Caulk a Bathtub Like A Pro
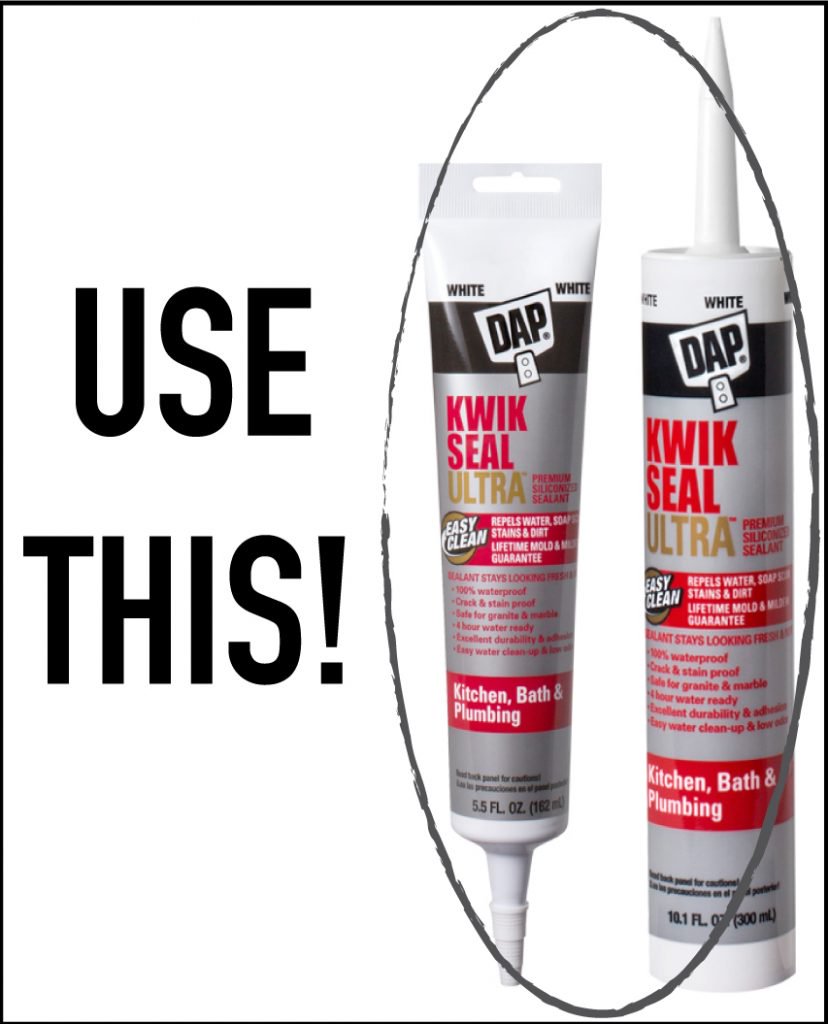
Caulking the bathtub is just one of those projects to do, that often gets put to the side. Or maybe you've tried caulking your bathtub only to realize it's a bit trickier than you originally thought, and the job didn't get done the way you would have liked. And even people with experience in DIY idea and projects to do can stand to learn a thing or two when it comes to caulking. There are several tips that will help you with this project to do, from knowing which caulk to pick to the simple tools that will help you with this do it yourself home improvement. It seems easy enough when you are starting off with this do it yourself home improvement, but from the moment you go to choose the right caulking, you realize you may need a little advice. One of the first tips for this do it yourself home improvement is to try choosing the Kwik Seal Ultra, which is a premium kitchen and bath sealant that helps to repel water, stains and dirt. This is a good choice when you are sealing bathrooms and kitchens. To start this do it yourself home improvement you will need the DAP Kwik Seal Ultra, the DAP Pro Caulk Tool Kit, a 5 in 1 Tool, painters tape, and denatured alcohol. For the full step by step tutorial for this do it yourself home improvement you will want to take a look at the Designer Trapped In A Lawyer's Body site. The following are just some of the steps in this project to do.
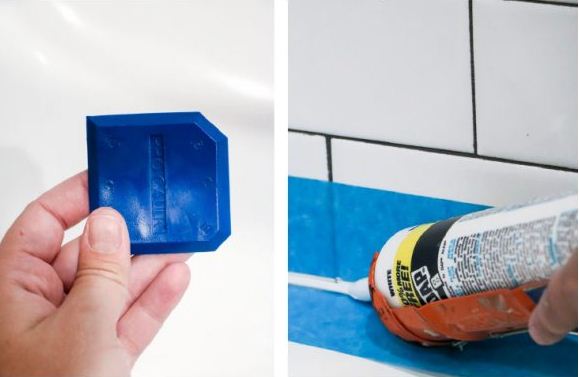
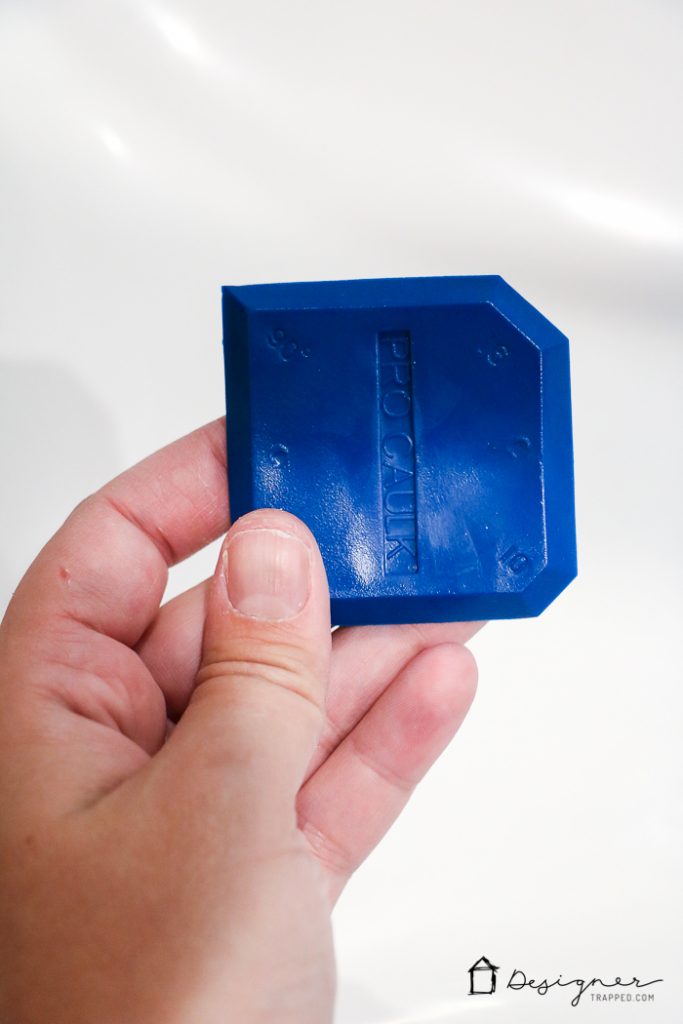
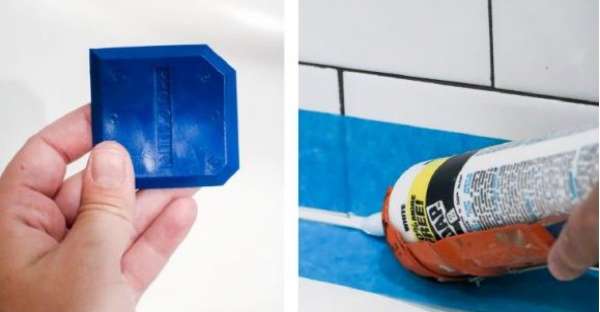
1) For this do it yourself home improvement you want to start by carefully removing any existing caulk from the joint between your bathtub and the tile wall surface. One of the best ways to do this is to use a 5 in 1 tool, which works really well for removing caulk. You want to be sure and scrub away any soap scum or mildew from the bathtub as well. After you have cleaned the seams, you can then wipe them down with some denatured alcohol to help remove any moisture from the seams.
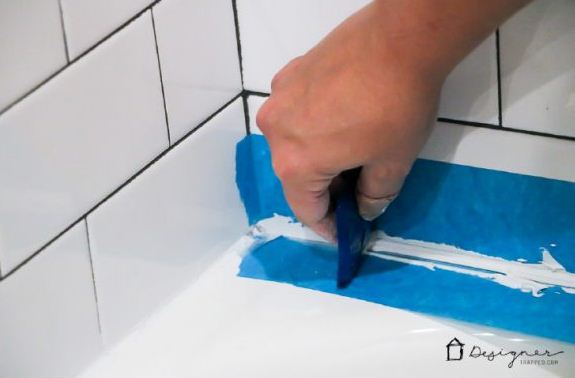
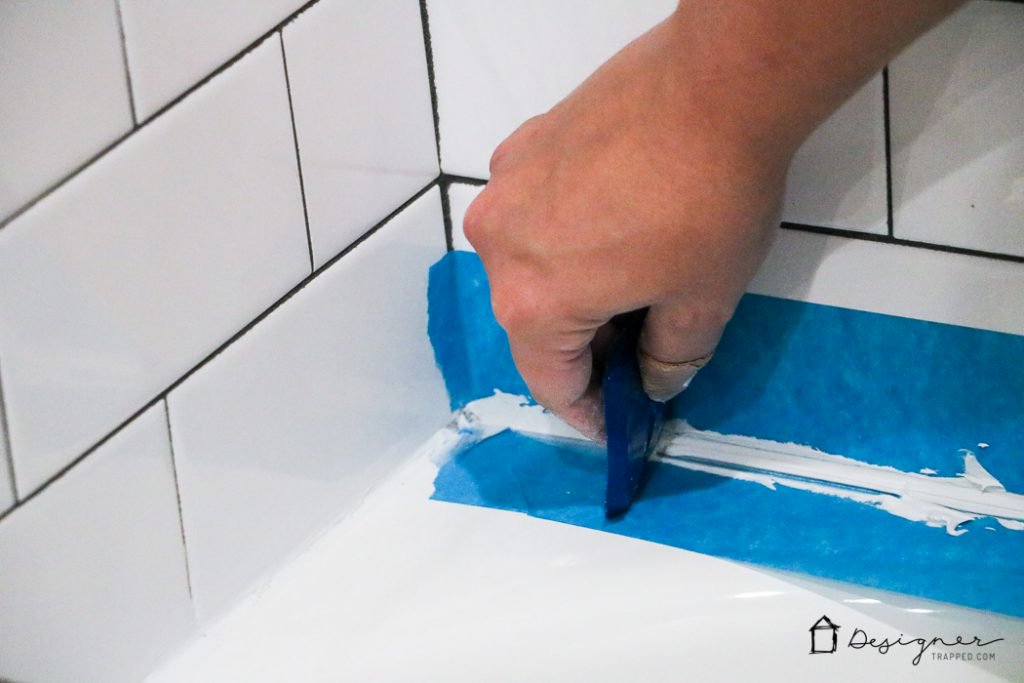
2) Next, for this do it yourself home improvement you want to apply the painter's tape to both sides on the seam where you will be applying the caulk. Make sure to line the edges of the up to exactly where you want the bead of caulk to stop. This tip will give you a perfect and even looking bead of caulk every time. This is such a quick and easy step to do, but it really does make all the difference on how your caulking will look in the end.
3. Then for this do it yourself home improvement and project to do you will load your caulk gun and prime the gun for caulking. Cut the tip of the tube to leave an opening that is large enough to form a nice bead of caulk. Make sure to be careful not to make the opening too large (getting the correct size takes some practice, and it is recommended to start small because you can always make it larger if needed). Most tubes have a thin barrier inside the tube to prevent the caulk from curing. Pierce the barrier with something that is long and sharp (many caulk guns have a built in poker for exactly this purpose). Squeeze a bit of the caulk out onto a paper towel to make sure you are ready to go. You will find this do it yourself home improvement on the Designer Trapped In A Lawyer's Body site. On the site, you will find DIY ideas, projects to do, do it yourself home improvements and more. **
Learn MORE / Get RECIPE at Designer Trapped In A Lawyer's Body
To help with slow website load, we have put all photos for this article here: View photo gallery.