She Presses Dental Floss Across Her Nail � When She's Finished It Looks Crazy Cool

If you love doing your nails at home, then this diy nail art hack is for you. When you do your nails at home a lot, you probably get tired of doing the same old thing over and over. So naturally, you'll want to spice things up a bit and get creative with your diy ideas and nail art. Good thing there are so many simple life hacks and diy nail art ideas you can try out. In fact, if you search "nail art" you're likely to come up with thousands of results. There are plenty of ways you can create a fun, beautiful nail look. You can add nail gems and crystals, you can put nail decals and stickers on, or you can paint interesting patterns on your nails. Some people even decoupage photos of their favorite celebrities on their nails. Some of the biggest nail trends right now are matte nails and different easy to paint patterns. You don't need any special equipment or nail tools to get some really neat looks either. Some of the diy nail tutorials only use tape or handmade stencils. This one uses just a simple personal dental floss pick to make a really cool look on nails. Other more intensive tutorials will have you paint on your own stripes with a paint brush, but this one is far easier than that.
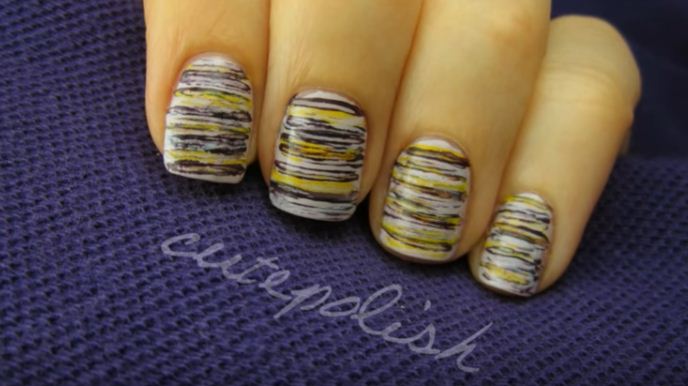
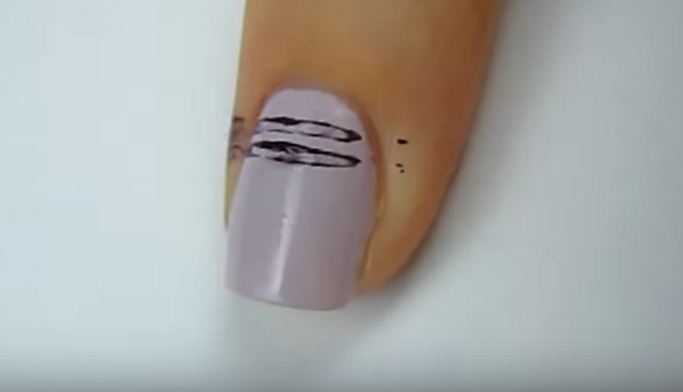
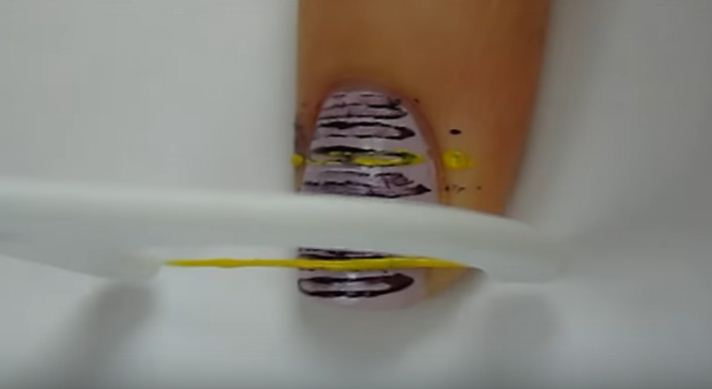
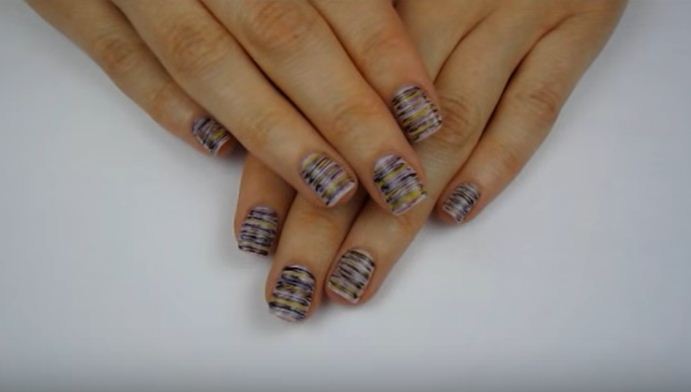
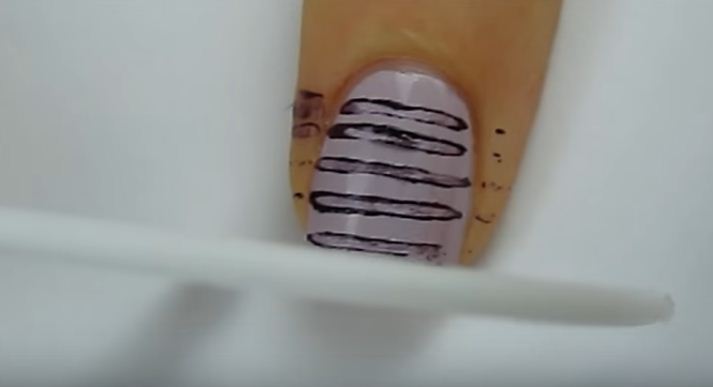
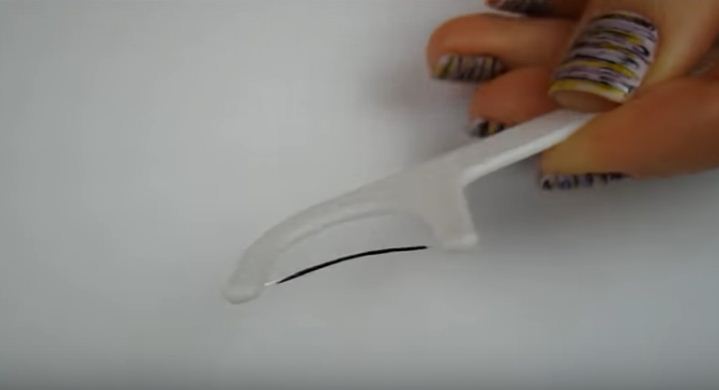
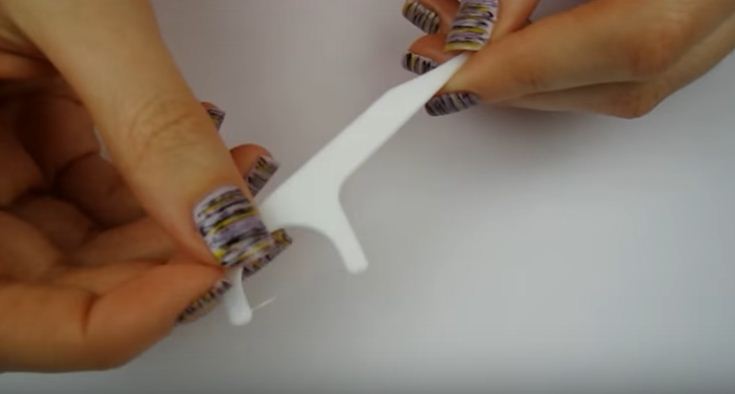
All you need for this diy nail art tutorial are some bottles of nail polish in different colors. You'll have a base color and then two or three different colors for the line art on the nails. In this video, she uses white as the base coat, and black and yellow as the line are colors. You can try any color combination you want. For summertime, some neon colors could be fun, or for springtime, you could try some pastel colors like pink, blue and lavender. To have the lines show up the best, try using a light base coat with darker, more pigmented colors. Or, you can use a dark base coat with lighter, less pigmented colors. Then, you need a couple of dental flossers; these are the plastic ones with the floss attached to them and a little pick at the end. You can buy a pack of 100 of these at your dollar store or a Walmart. Make sure you get regular floss and not the floss for sensitive teeth or a soft glide floss, it won't pick up the paint as well as the regular floss.
Start out with a base coat, paint all of your nails in the color of your choice giving them two coats of polish. Then, allow them to dry completely and grab your first color to use for the lines. Brush on some of the line color onto the floss part of the flosser, be sure that you put just enough on and not too much. Then, press one end of the floss down onto the nail and your skin, and using a rolling motion, press the whole line of floss down on the nail. Don't worry that there's nail polish on your skin; you'll clean that up after. You can do as many lines as you like, experiment and see what looks best on you. Allow those lines to dry completely, and then do the same thing with your other line color. Have some fun with it. Once you have a look you like and all the polish is completely dry, seal it with a clear top coat to protect your nail art. Then, clean the nail polish off of the skin around your nail with a Q-tip and some nail polish remover. Try out more of the latest nail art trends and simple life hacks on the Little Church Mouse website.***
Learn MORE at Little Church Mouse
To help with slow website load, we have put all photos for this article here: View photo gallery.