This Clever and Beautiful Use of Recycled Bottles is a Tiki Must See!
Making do it yourself home projects like this cool tiki torch is a great way to decorate your garden space affordably. This is such a beautiful and clever use of recycled bottles, you have to see this tutorial. If you love to live outside in the spring and summer time, this is one of the diy ideas you're going to want to try out sometime. Spending time outside is a great way to relax, and if you have a nice back yard of your own, even better. You can decorate and adorn your back yard as you like, in your own style. Do it yourself home projects like this one from Build.com's YouTube channel give us ideas and ways to incorporate more up cycled treasures into our lives. You've probably seen all of the nice tiki torches at stores and home and garden centres, but they tend to cost quite a bit, especially if you want to buy several of them to light up your back yard. The tiki torches in the stores are most often the ones that are made of bamboo and stick into the ground, and you fill them with lighter fluid to ignite the flame.
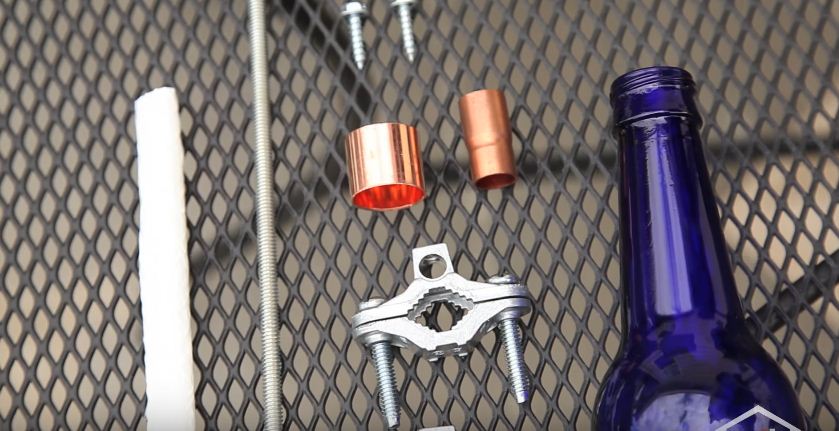
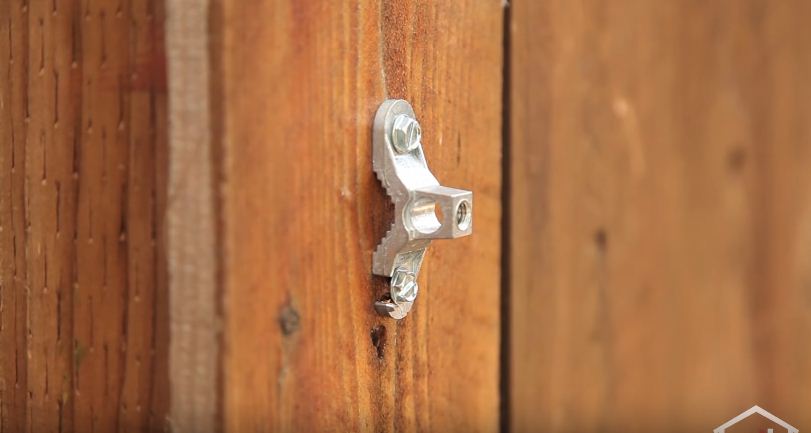
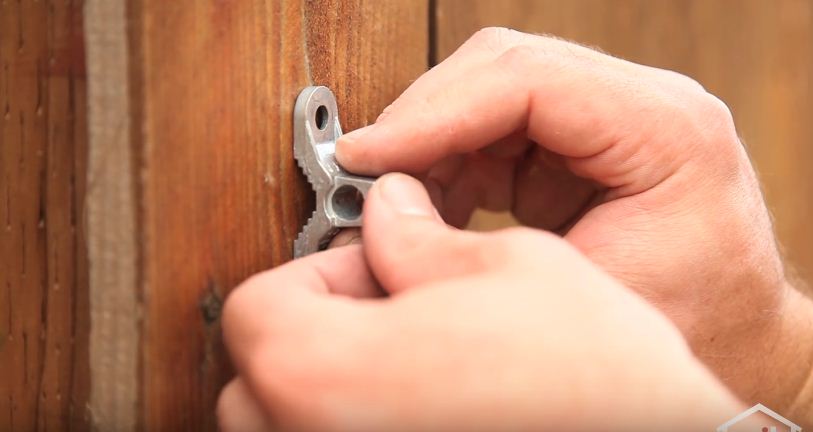
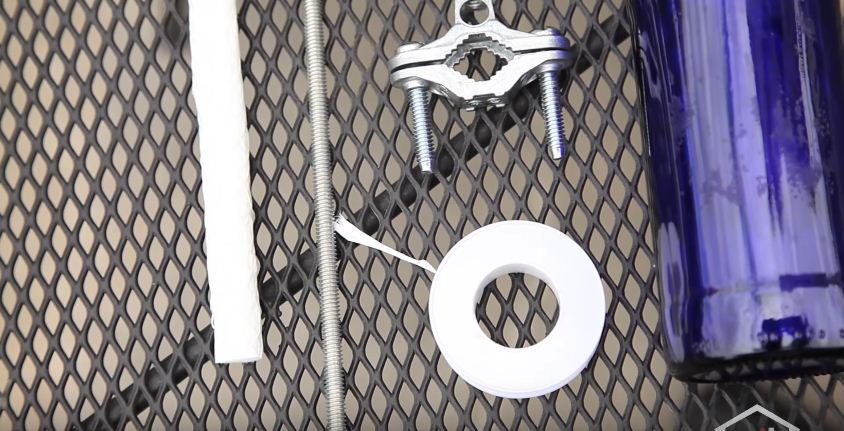
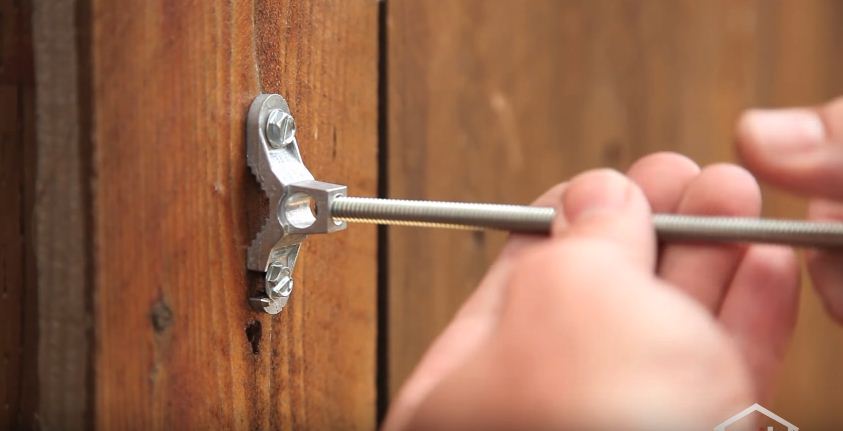
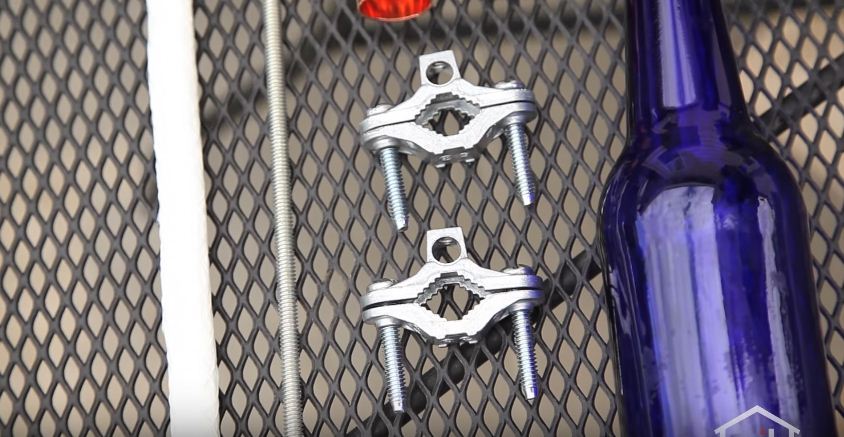
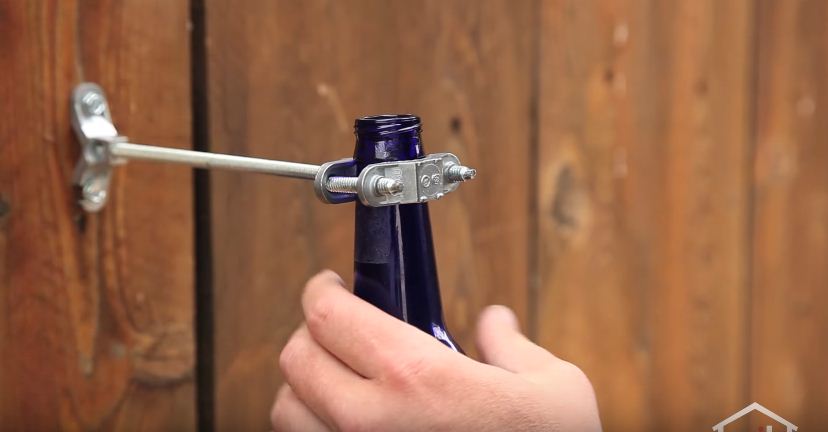
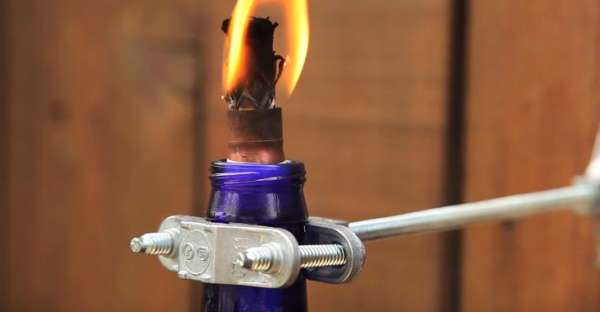
These bottle tiki torches are the same kind of idea as the bamboo torches, they are attached to the fence instead of putting them in the ground. Plus, they offer ways to recycle your old bottles into some yard art. So save up all your cool, colourful bottles for some diy ideas like this one so you can put them to good use. For this tutorial, they use blue bottles, which look really cool and add a pop of colour to the yard. You could also use brown or clear bottles if you want depending on what you have and your own personal preference. All you need for the diy project is a few bottles of your choosing, they used beer bottles in the video, but you could try larger wine bottles if you want. You also need some treaded rod, and some grounding clamps, with screws and your wick with copper coupler and cap and some tape. In the tutorial you're shown how to cut the threaded rod to the size you want it, you don't want it too close to the fence, and putting it too far away could make the torch unbalanced. Then, you attach the rod with a grounding clamp to the fence post by screwing it into place.
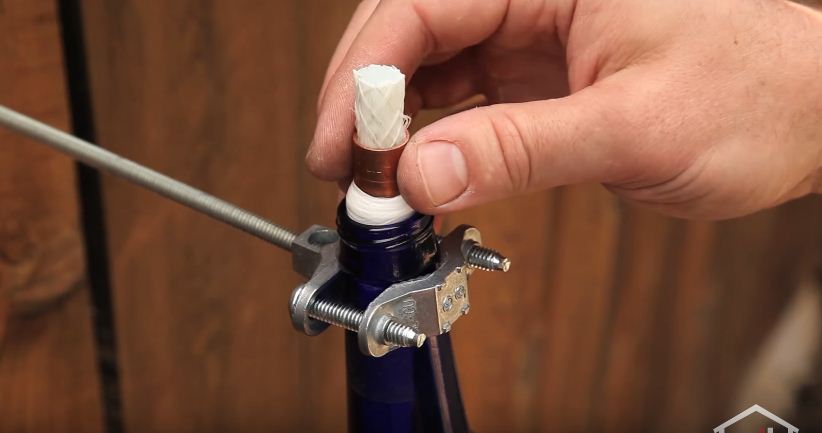
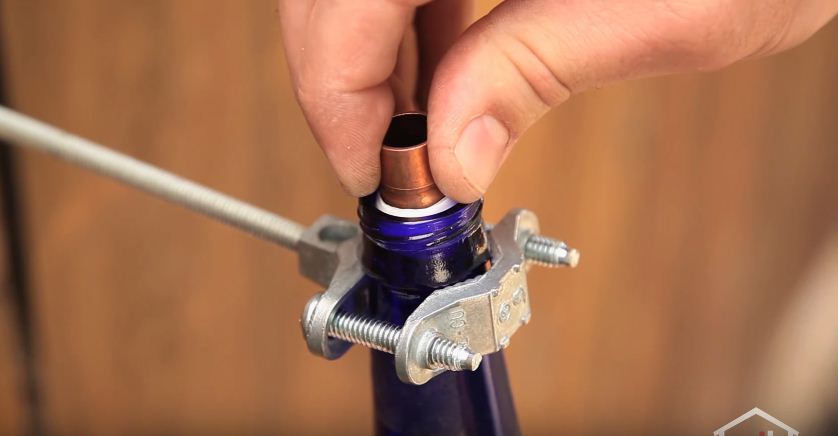
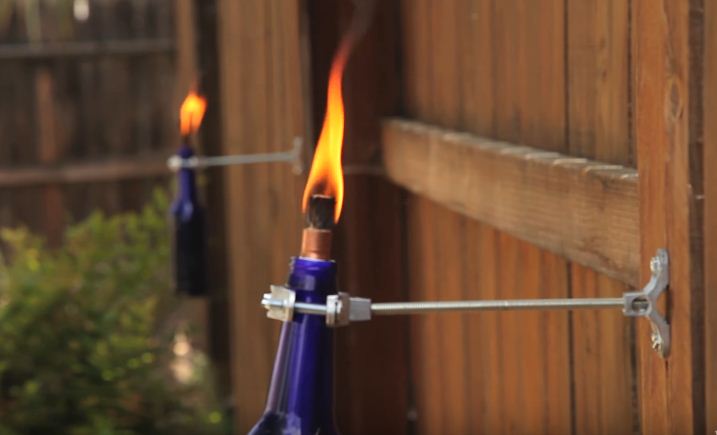
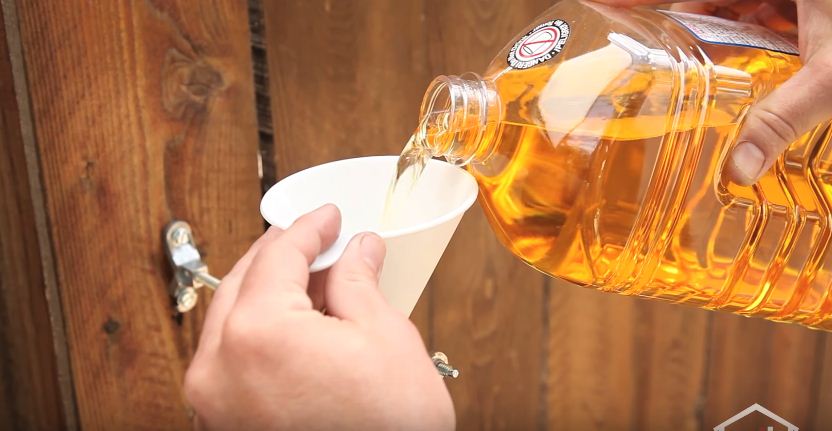
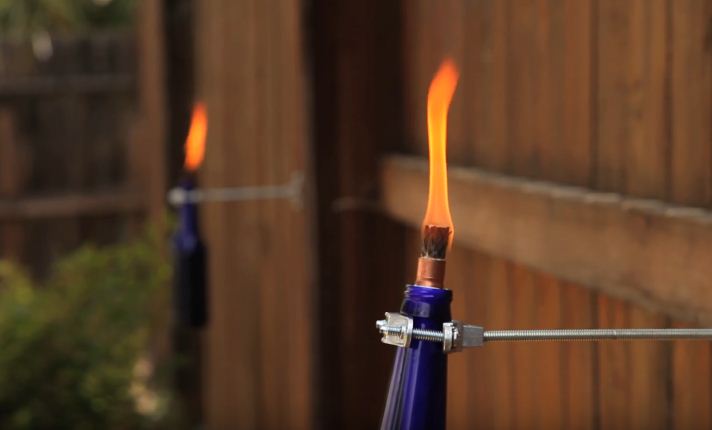
Once the rod is secure, all you need to do is attach the other grounding clamps on the other end of the rod and then insert and clamp the bottle so it's nice and tight. The coupler is inserted into the bottle by wrapping it with teflon tape so it stays secure. You fill the bottle with torch fluid just like you would a regular tiki torch, and thread your wick through the coupler and set it in the bottle. Then all you have to do is light it with a lighter or a match and you've got yourself a homemade tiki torch. The copper cap is to put on the outside end of the wick so that rain or water doesn't get on it which would prevent it from lighting in the future. These torches look so pretty all illuminated around the yard, and they'll last a really long time as long as you keep topping up the lighter fluid occasionally. Try making these awesome torches for your own back yard and try out some of the other do it yourself home projects from Build.com's YouTube channel.***
Learn MORE / Get RECIPE at YouTube - Build.com
To help with slow website load, we have put all photos for this article here: View photo gallery.